Showing posts with label Game Development. Show all posts

Wednesday, February 4, 2026

Game Dev Processes & Improvements

 Hello! Today I'm going to reflect on my processes for Game Development and how these can be improved. 

Tasks/Notes 

One of the issues I've had is that I've started at a Unity project without any resemblence of what even to do with it. This usually occurs at the start of a project when there is a blank slate, and when there is confusion about what to do to build the project up from scratch. The result of which is a tendency to become distracted and to do other things instead like browsing YouTube. 


One thing I've tried doing to solve this is by making to-do lists of tasks, however, another issue I've had is writing notes or to-do lists that are too vague in content and not easy to understand in handwriting.  


 To fix this, instead of writing down notes quickly like I used to, a better method would be to sit down and think of what needs to be done for a particular task, and then write down the steps to complete that task. Take shooting a bullet out of a Tower for example. What are the steps I need to take to complete this task?


Slowing down, creating step-by-step instructions and writing in a slower but more readable way helps to get an idea of what needs to be done to implement something. The first few steps are very easy:


Comments

Another issue I've not really considered yet until recently is comments. I previously didn't use comments that much, usually because of a sense that I didn't need them. My projects are usually solo or where I'm the sole or main programmer and where sharing code was not usually needed, however, I recognise that comments are very useful when looking back on code, when sharing code with others or when figuring out what to do to implement lines of code. Take shooting bullets again for instance, what needs to be done in the script to shoot a bullet? 


Here, I can break one big task (shooting a bullet) down into more individual taks like getting a target and shooting. Then I can abstract further in a Method, writing down tasks for that too. What do I need to do in ShootBullet()? Then I can think of the things I will need for this function. In this case I will need 2 variables, the speed at which the bullet fires and the speed between bullets. 

As with a lot of things in life, it often doesn't go according to plan immediately. Here I notice 2 problems, 1 is that the bullets are moving very slowly, a consequence of the time.DeltaTime I used to multiply the bullet speed, the other is that it is shooting a lot of bullets a second, which causes some slow down. The solution here is to, in the Unity inspector, to increase bulletSpeed by a lot.
 

 The second problem is also easily recognisable but needs some more code to fix, the script is shooting a lot of bullets per second instead of shooting one, waiting for the speedBetweenBullets and then shooting, the absense of a speedBetweenBullets in the script above is an obvious indicator of what I've not put in yet.


 I knew how I could potentially fixed it so I went ahead and implemented it: I changed the ShootBullet method to a Coroutine, I introduced a isShooting bool and added it to both the if statement where ShootBullet is called and the Coroutine itself.


 Now the code will check to see if ShootBullet is false in addition to seeing if there is a target, if both is true, the Coroutine is called. In the Coroutine, isShooting is immediately set to true to prevent StartCoroutine from being called again, and at the end of the Coroutine after the yield return line where it waits for bulletSpeed, isShooting is set to false so it can be called again.


It's getting there! But it still needs some work. The 2 things I notice are that the bullet isn't moving exactly to the enemies location and that its still too slow. I check the TowerShoot code and notice that I've set AddForce with target.up rather than transform.up.


 Here I notice that the rotation in another script, TowerAttack, isn't quite rotating to the enemy. 
 

To try and fix it, I turn offset into a variable than I can edit in the inspector and then I play around with it a bit, eventually I find that -90 works well. However, the bullet is still too slow and it only fires 1 bullet which is a little strange. 
 
I look up Unity bullet shooting on the Internet and I find a Medium post. I realize that the time.deltaTime was causing some of the issues and that I can remove it and revert bulletSpeed to its original value.
Finally, I need to deal with the fact that it is only spawning 1 bullet per GameObject. I try to replace LeanPool.Spawn to Instantiate but this doesn't fix it.
I wonder if TowerShoot loses sight of the Target after the first bullet, so I put in a few Debug.Logs and I run through the game frame-by-frame starting from the moment it notices a target, and suprisingly it doesn't.
I remove the target check to null and check the results. Oddly enough when I expect a null reference error it doesn't show that and instead fires once. 

This is bizzare. I start to think that I may have to redo the script that finds the nearest enemy, which I'll do with some Google searching and reading. 
 
 
But I'll call it there for now. So that is my game dev process and how I could go about improving it. As for my current issue, I'll come back to it with a fresh mind, after lunch.


Sunday, June 11, 2023

Chill Jam 02, Day 1: Water, Character Movement, and a thunderstorm IRL.

 Today, I started work for the Chill Jam 02: Summer Edition. It started at 10:00 PM BST last night and by then, I had begun to think of ideas for the game. 

Initially, I had planned to make the game in Unity’s 2D mode and with URP. By the time I woke up the following day, however, I had decided to use Unity’s 3D mode instead, with URP. I chose this because I enjoyed working on my previous jam project, Jim’s Marble. 

I first started by creating a river. I did this by using a YouTube video for creating water within Unity. I had not worked with shaders before in Unity so it was a bit difficult to follow, but it was similar to the node system within Blender so I was able to mostly get it working. What I couldn’t get working was the Normals, I couldn’t find a free version of water normals. The usual place I go for free textures, PolyHaven, doesn’t have any, and textures.com didn’t provide the normals for their water textures. 

This is what I came up with. I think it’s a decent first effort.


Shortly afterwards, I got a reply by someone which had a open-source water shader they had made, along with the normals. I haven’t been able to correctly implement it into the game yet, however. 

While I was waiting for lunch to cook, I used a notepad to make an action plan for what I wanted to put in, and to describe the essential and nice-to-have features. 


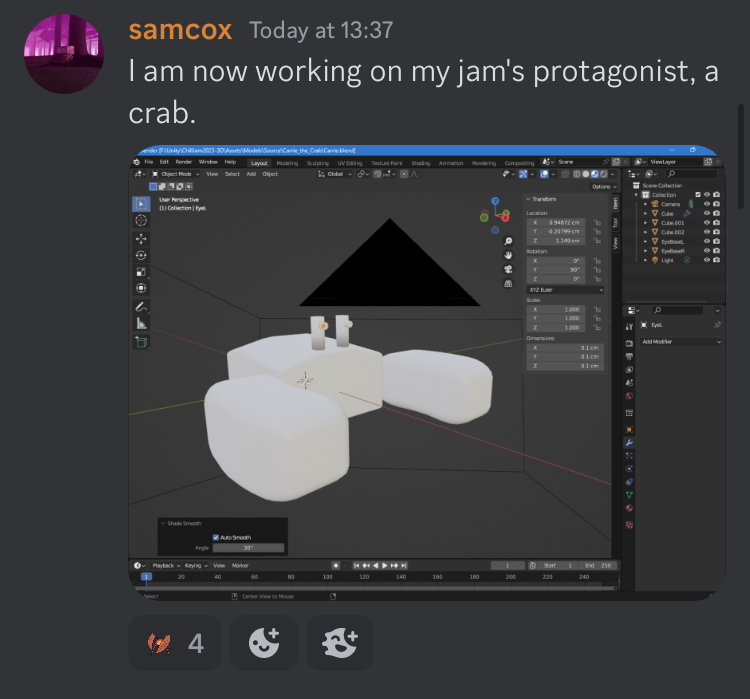
I had already decided against using my flagship OC within the project, so I decided to create a new character. I wanted to make an animal character that would fit the theme, and it didn’t take long for me to land on a crab. I chose the name “Carrie” for the crab, as it sounded right. 

It had already started to gain a bit of attention when I shared this in-progress screenshot. 


Initially, I wanted it to be a purple crab based on what I saw from a NatGeo article, but I went for a more standard colour instead. I also added circular eyes a little later on in the day. 


I started Brackey’s Third Person Character tutorial. It was a bit more understandable than the shaders graph but I found the angle part difficult to understand near the end of the tutorial. A sign that I need more practice 😅 There was a bit of an issue where the camera was sticking close to the ground. I fixed this by going back into Blender and scaling Carries body parts by 10, and then re-exporting. 


However, while I had a bit of the movement script implemented, a thunderstorm broke out. 


I can’t say that I didn’t expect a storm, I knew that there was a possibility for a storm, but I never expected one today. 

I immediately unplugged the extension cable that carried power to my electronics (My laptop, my M1 Mac Mini and a 75Hz Dell Monitor from 2007).

 I returned to the project an hour later, but with my stuff unplugged. The main consequence of this was the fact that my laptops GPU (an RTX 3070 mobile) would be limited by it’s powered. Indeed, Unity was showing a maximum of 30FPS and it was about 17FPS in 4K (it was showing around 200FPS while I was plugged in). 

Despite this, I was eventually able to complete the tutorial and get a working version of a player movement script. 


Finally, the last thing to do was implement a date/time system and a points system. The former was much easier to work with. I created a new script called DateTimeManager and threw in some code which increased the value of the gameMinute variable. Once the gameMinute variable reached 60, it would then add to the gameHour. And if the gameHour would hit 24, it would reset to 0 and the gameDate would be incremented by 1. 

private int _gameDate = 1;

[SerializeField] private int gameHour = 6;

private int _gameMinute;

[SerializeField] private int timeMultiplier = 2;

private void Start()
{
_gameDate = PlayerPrefs.GetInt("Date");
}

// Update is called once per frame
void Update()
{
AddToGameTime();
}

private void AddToGameTime()
{
if (_gameMinute <= 59)
{
_gameMinute += timeMultiplier;
}
else if (_gameMinute == 60)
{
_gameMinute = 0;
if (gameHour + 1 == 24)
{
gameHour = 0;
_gameDate += 1;
PlayerPrefs.SetInt("Date", _gameDate);
Debug.Log("Day " + _gameDate);
}
else
{
gameHour += 1;
}
}
}

public int GetGameDate()
{
return _gameDate;
}


This doesn’t have any effect yet, but I plan to have a system where the Skybox is affected by the current hour. The system isn’t bug free, as it does add a bit too much, but it’s fine for now. 

Finally, I worked on the scoring system. This was surprisingly difficult, as I initially couldn’t get the script working to destroy the coin object and provide a player with the coin. I had come up with a player scoring script, and so I decided to handle coin collisions directly on the player. This provided to work, some of the time. Occasionally it didn't work, so it's something that I will need to fix.  

private int _playerPoints = 0;

private void Start()
{
_playerPoints = PlayerPrefs.GetInt("Score");
}

public int GetPlayerPoints()
{
return _playerPoints;
}

public void AddPlayerPoints(int pointsToProvide)
{
_playerPoints += pointsToProvide;
}
private void OnTriggerEnter(Collider other)
{
if (other.gameObject.CompareTag("Coin"))
{
Destroy(other.gameObject);
AddPlayerPoints(1);
Debug.Log("Player Points: " + _playerPoints);
}
}

Tomorrow, I will create the tree models, and shaders for the sand. I will also create crab NPCs, and I will start to build for WebGL and iOS, ready for player testing. 


Thursday, April 20, 2023

Foundation Year Final Project: Post-Production Week 4.

polyDungeons ended active development on April 18th, out of a desire to avoid breaking the game as it currently is. Bug fixes will still be made when they are needed but for the most part, the game is ready to be released on April 25th.

Despite this, I made 2 final changes. First, I changed the bullet behaviour to destroy when it collides with anything that has a collider. 


Second, the enemy spawner at the end of level 1 no longer spawns patrol enemies, due to it spawning stronger enemy2 enemies that block each other at the end of the spawner. 


And with that, the game's development cycle is complete, ready for the game's launch on April 25th. 


Monday, April 17, 2023

Foundation Year Final Project: Post-Production Week 3.


 This week, I made some general improvements and fixes.
 
The first thing that I changed was finalising the wall design of level 2.  


The 2nd fix I made was allowing the player to access the buttons on Level 2, which wasn't possible before. 


These 2 changes allowed me to put out a new build featuring a 2nd level shortly after. 

One of the goals I had this week was replacing the coin collection sound, which had proven to be disliked when I asked people whether or not I should replace it. 


One bug fix I implemented this week was changing the bullet functionality to destroy itself if it collides with any colliders. This change means bullets no longer hang in the game. I've also made the change to the projectiles that the firebowl objects put out. 


The 2nd level initially didn't have a way to block off the player from the deadly water that I added. That was until I moved the players position and added more wall tiles to ensure that the player can't access it, like in Level 1. 


I've tried adding screen shake but it broke the shooting mechanic that I've got, so it's disabled for now.


One of the feedback requests I got was to have a "lock-on" camera that moves with the player's mouse. I was able to do this by modifying the cinemachines follow object to the object responsible for shooting direction, which is controlled by the mouse.

As you can see here, I've also changed the enemy hit sound to be the same as the players. 


And I got a new collection sound from kenney.nl.


The last change I made this week was to fill in the new section with flooring. 


I then uploaded a new build yesterday.

For the next week, I will continue to fix any remaining bugs. 


Sunday, April 9, 2023

Foundation Year Final Project: Post-Production Week 2.

 For this week, I decided to start work on Level 2. 


The first thing I did this week was modify the code so that if the player is hit, the player briefly turns red before reverting to the player's original colour. I've also modified the code so that if the player was hit recently and an enemy tries to hit the player, they would be pushed back. 


I was not planning on adding a 2nd level to polyDungeons, but after some feedback from my teacher. 

For the 2nd level, I first started work on an NPC. I used a program called Libresprite to create a sprite image of Wilbo, a character I made in 2021. 


After adding an outline to the image, I then put Wilbo in the game. 


I created a speech box in Libresprite and I put it on Wilbo's GameObject.


I then programmed Wilbo so that his speech bubble activates and deactivates if the player is colliding with him.


I coded Wilbo so that his dialogue can be cycled through using a specified key.


Following this, I also added code that disables the player's weapon whenever they enter Wilbo's zone.
 

You may notice another character. I've added another character in the game, Jeff, and I've made him an NPC that follows a path. 


After that, I also started work on a saving system, creating an image in Libresprite and a GameObject in Unity. Work on the feature is still ongoing. 


I outlined the game's 2nd level in Adobe Freso, and I also created a roadmap for what needs to be done. 


I created a new enemy in Libresprite, and I then added it into Unity.


The enemy works by shooting bullets below which can cause the player some damage if they get hit.


For the last change this week, I modified the end object so that if there's another level, the player will be sent there instead of the game over screen.


For next week, I will finish up my 2nd level and put it up for feedback on Tuesday.


Thursday, March 30, 2023

Foundation Year Final Project: Production Week 7/Post-Production Week 1.

I've got some updates for my project this week, mainly that I've finished the Production phase of my game and it has now moved onto the Post-Production phase.

Game world.

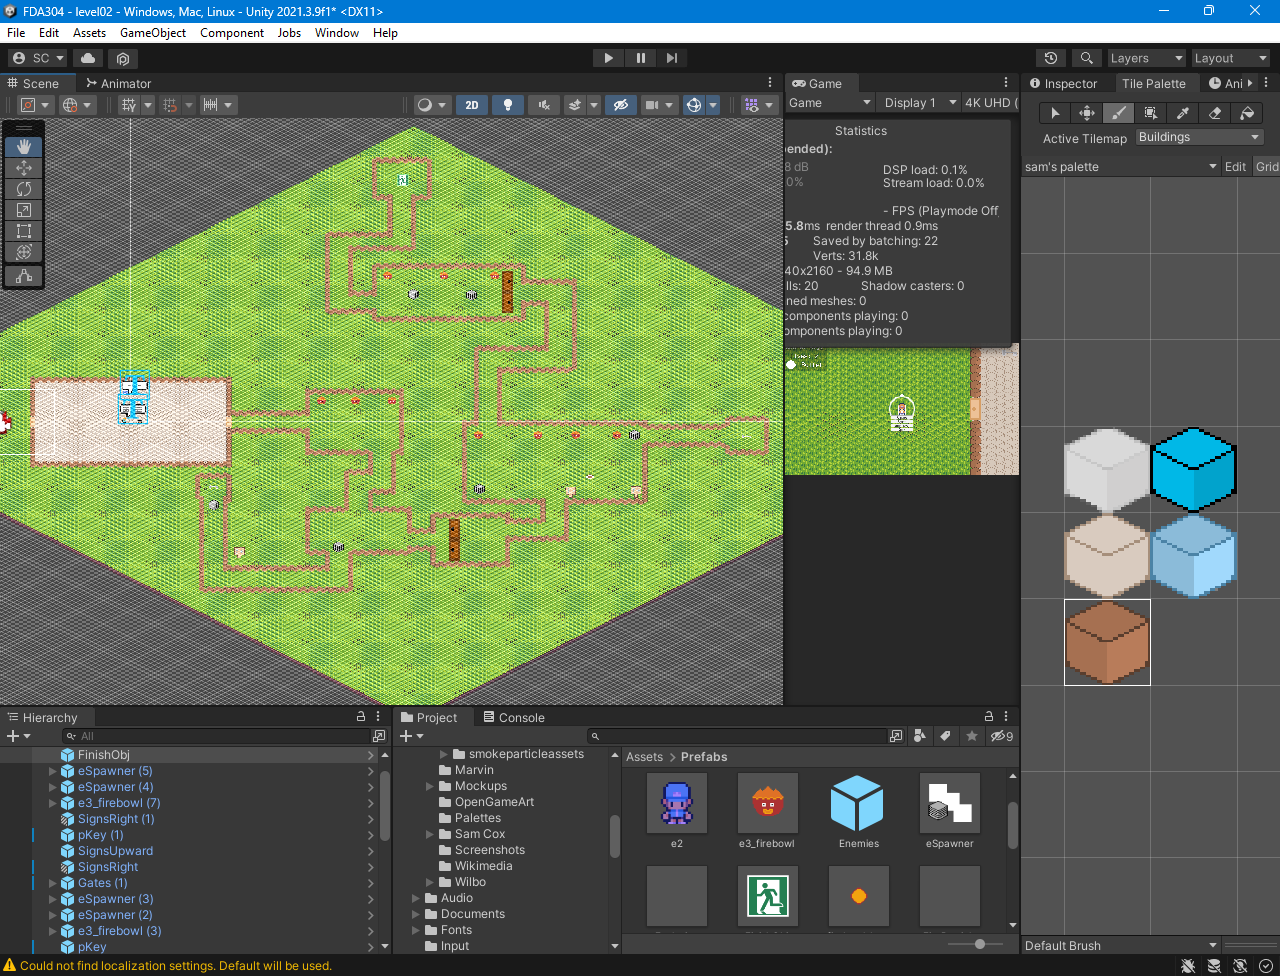
The first thing I did during this week was fill in the remaining sections of my game's background. 


Melee.

I then got on with implementing the melee fighting portion of my game. One of the requirements was that my game should have "Two different attacks that have different damage and attack speed values." I have already implemented one type of shooting (the bullet shooting), but I had not worked on the sword code yet, which I started to do for this week. 

I started by creating a sword game object and implementing code to spawn that sword when the player is in the sword mode (activated/deactivated by pressing the Tab key/Middle Mouse button). 


I implemented a new sword script and an animation file. The animation activates as soon as the sword is instantiated in the game and it shows a sword swing. 


At the end of the animation, I have placed an event which triggers a function within the code. The function destroys the sword game object. 


Although I was able to get the sword spawning and swinging, I was not able to get it working properly with enemies at the time, as any hit would decrease the players health, not the enemies. However, I was able to fix it later. 


Enemy spawners.


Another problem I had was with enemy spawners, as the former code would spawn lots of enemies at once, which added to the every 10 seconds regardless of existing enemy amount and which slowed down the game and made it harder for the player to progress, especially slower players. 

float eSpawnerAmount = FindObjectsOfType<enemySpawner>().Length;
float enemyAmount = FindObjectsOfType<e1Movement>().Length;
if (enemyAmount <= eSpawnerAmount)
{
_spriteRenderer.color = Color.blue;
Invoke("SpawnPatrolEnemy", 1);

}
This was the code I came up with for the solution. Once the timer runs out, the game finds the amount of enemy spawners and the amount of enemies. If there are less enemies than enemy spawners, than the game changes the spawner colour to blue, waits one second and then spawns the enemies. 
void SpawnPatrolEnemy()
{
SpawnEnemiesInSpawnPoint(SpawnPoint2);
CheckHealthLevel();
}
It then reverts the enemy spawner object back to it's previous colour by checking the object's health.

Enemy effects.

I decided to experiment with enemy death effects. I did this by creating a new game object which spawns every time the player shoots the enemy down. 

I also added a particle object on the existing particle object, so that I could try to make it resemble a fire. 


In the end, I decided to comment out the code that spawns the particles, thus rendering them unusable in game. 

Game Menus.

I decided after that to work with the game's menus. Because I had done this before, implementing the buttons was very easy. The buttons link to a function that opens levels, in this case, the first level and a "How To Play" screen. The last button quits the game, although this only happens when the game is built and not in the Unity editor. 


I've noticed from the single piece feedback I had received so far for polyDungeons and the feedback from my previous games, that implementing a "How To Play" screen would be a good idea. The screen doesn't show the controls, just how to play the game. 


Post-Production Launch.

I finished the Production phase by building the 26_03_2023 version of the game onto 4 platforms, Linux, MacOS, Microsoft Windows and WebGL. I skipped Android as I didn't want to deal with the complexity of that platform and because I had not implemented shooting controllers for gamepads yet. I also supplied a feedback form in the game's Itch.io page. 

Post-Production Feedback.

After that, I started to gather feedback for my game. I provided links to 2 Discord servers, 1 of the groups was a public server whilst the other was a server for developers in Southampton. I also gathered feedback by setting up my computer space at University (which has 2 monitors) to have the game playing on the left monitor and the feedback form on the right monitor.

2 suggestions I received from the public server concerned the UI. The person who gave feedback didn't know what the icon on the top left did, and they also couldn't figure out how to close the How To Play page at first. 

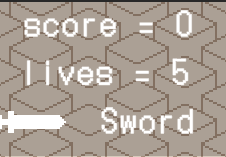
Previously, the game featured an arrow image on the top left of the game to represent bullets. 


In the How To Play scene, I had also used a button to close out of the scene.


I dealt with the first bit of criticism by adding a label next to the object on the top left of the HUD. I also changed out the arrow for a silhouette of the bullet used in the game. 


For the 2nd bit of criticism, I moved the button to close the scene to be inside the background blur. 


I noticed that some reviewers didn't catch the feedback link within the Itch page, so I added a button to my Game Over and Main Menu screens, that opens a version of the feedback form that pre-fills in the version that the player is using. 


For the last 2 major changes for this week, I changed the way the sword works to get it to work with enemies.

Previously, the sword used the Box Collider 2D for collision and with the OnCollisionEnter2D function. The problem was that the enemies and players also used the same components, and because the sword spawns as a child of the player, the game treats the sword as the player, which means that when the enemy touches the player, the player loses a life. 

I resolved this by changing the Sword type to a trigger using the "Is Trigger" function (see below).  


You may also notice another change in the video. I've changed the amount of lives that the player has from 3 to 5, in response to feedback I received from the public game dev server. 

For next week, I will make a new build based on the feedback I've received so far, and I will continue to gather feedback ahead of the launch date,  April 27th. 


Thursday, March 23, 2023

Foundation Year Final Project: Production Week 6.

The changes from Monday to today are mostly small changes but they represent improvements to the game ahead of the deadline for finishing the first level (27/03/2023). 


Changes to enemy spawner. 

I've added code to my game's enemy spawner object that implements a timer into the spawner, and once the timer variable is greater or equal to another variable (currently 10 for all spawners), then an enemy is spawn and the timer is reset. This code works as long as the enemy spawner is not shot down. 


This did present a problem, as enemies from later parts of the game would push up against each other and eventually outside the 2D Tilemap collider that I've added to the walls. I fixed this by changing the enemy movement code to move enemies using their Rigidbody2D components, rather than by their Transform components. 

Map changes.


I've expanded my game's map by adding new alleyways. The work on expanding it is still ongoing as evident by the flooring that hasn't been expanded to the new areas yet.

New Door Image. 


A minor change I've added is the addition of a new door sprite, as seen above. I made it in GIMP and I then imported it as a PNG. I've also modified the game object to remove any unnecessary children game objects. 


New Coin. 


The final change for now relates to the coin system that I've got in my game. I created another coin in GIMP, using a Diamond blue colour. I then created a new prefab-variant in Unity and replaced the default coin image with the new blue image. 

This new coin now grants the player 10 points rather than 1 point for silver coins and 2 points for gold coins. 


Game Dev Processes & Improvements

 Hello! Today I'm going to reflect on my processes for Game Development and how these can be improved.  Tasks/Notes  One of the issues I...